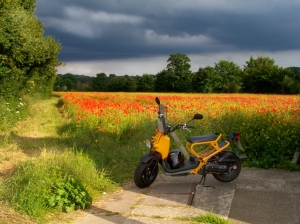
The Honda Zoomer is a 49cc scooter and in the UK at least, it’s restricted to a top speed of 28mph which is not only rubbish but pretty dangerous too since generally the speed limit around any built up area is 30mph.
A scooter doing 28mph is not as slow or easy to pass as a bicycle yet is not fast enough to keep a comfortable speed along with the cars. The result of this is a nice long queue of traffic behind you not too dissimilar to being a tractor on a country lane and they all want to pass you but 28mph isn’t an easy speed to pass in a 30mph zone…seeing the problem here? Angry drivers get far too close to your back wheel.
I looked into derestricting my scooter and found this could be done with the Polini Kit shown here:

The kit includes a CDI unit which is the computery/technical ‘talk to the engine’ gubbins. Yes, those are technical terms. It also includes different tubes for the air intake, rollers for the speed variator and a sporty exhaust with some brackets.
A few months back Wil kindly bought me the CDI unit thinking that this would be the answer to my de-restricted dreams of 35-40mph. Not so, but what we did accomplish by fitting the CDI on its own was to take away the rev limit so that it didn’t max out at 28mph (or 30mph down hill). It also caused a very random issue when I indicated left or right (but mostly right) in that it would cut the revs like I’d just let go of the throttle for a second and then wind back up…. NOT the nicest thing that can happen to you when you have that trail of cars right on your arse. That said, once the rev limit was gone I did get a top speed of 33mph (35 down hill) although when I hit the top speed I think I was hitting the engine limiter as it would make a high pitch resonating sound that it didn’t make before which could be stopped by letting off the throttle a bit. We thought that most of these little issues would be sorted by fitting the rest of the kit.
Today we installed the exhaust,air pipes and variator rollers.
I’m dissapointed to say the Polini kit is shockingly shitty quality. While the body of the casing is mostly brushed metal effect the end of the pipe is polished only it looks like its been polished and then dropped on the floor a bit. There are many small scuffs and marks around the end of the pipe which at first I thought must be damage to the sticky plastic covering they’d put in it to protect it. Then I found there was no protective covering – the finish on it WAS just that shitty. What you’ll be relieved to know though, is that they put a little plastic covering over the POLINI badge on the side of the exhaust because we wouldn’t want that getting scratched in transit would we!
The kit comes with a small booklet of instructions for installation. Although only a page pertains to the English version of these instructions which seem to have been poorly translated from Italian and they are so vague that they may as well read like this:
“Exhaust – your kit comes with a exhaust. Fit this to your scooter. CDI – your kit comes with a CDI. Fit this to your scooter. Pipes – this kit comes with some pipes and lots of bolts and nuts. Use some of these to fit the pipes and bits to the other bits that you’ve already fitted to your bike”
There is also a page of photos which are intended to assist the written instructions although, they are about as much use as a chocolate teapot. Imagine this:
“Scooter Exhaust – fit this to your bike using the rubber bands and clamp along with the bolts and bracket as in pic A”
(Pic A)

What really didn’t help while following these useless half arsed instructions was that although they listed all the parts that were supposed to be in the kit, they didn’t list them with a picture of that part so it was anyones guess as to what parts were what. This was even more frustrating when we finally figured out that THE RUBBER BANDS required to be placed under the exhaust clamp WERE MISSING!.. You’d think maybe it was just this kit however we encountered the same problem when we bought the CDI on its own originally and found none of the connectors mentioned in the instructions were supplied.
The first part we installed was the pipe that sits between the engine and the can part of the exhaust. Without going into too much detail the fitment of the this pipe was slightly hindered by the lam sensor which was a tight squeeze up against one of the plastic casings covering the engine. The second hitch was the gasket that sits between the flange on the pipe and the can. This was too big to sit well in the recessed circle made for it although the two pieces did bolt together ok. Ask me in a few days if my exhaust has started blowing yet!
The last parts of the exhaust to fit were the brackets. The C-shaped clamp that went around the can had small flanges at the end with holes intended for 2 bolts to go through which would tighten down behind the exhaust to make the C-shape into an O. The bolts supplied in the kit were about 2cm too short leaving no possibility of pulling the two pieces of the clamp together so we ended up supplying 2 much longer bolts of our own.
Once the exhaust was fitted we moved on to replace the pipes on the air filter. The instructions here explained very little so we had to use some common sense and a bit of guesswork replacing these pieces. Again, the kit came with a small set of rollers (shown in the picture above in blue and red – except ours were all blue) which sparked another episode of confusion as the last instruction reads something like:
“This kit is designed for use with Polini Speed Control code no. 12345. This must be upgraded with the rollers supplied”
To me this suggested that we should have also ordered or been supplied with the Polini Speed Controller (aka variator), and then place the rollers we’d been given into it. However, we finally worked on the theory that the Ital-English poor sentence should be understood:
“This kit is designed for use with the Polini Variator. If you are not fitting the Polini Variator use the rollers included in this kit in your original variator” So we did that!
After installing the entire kit I took the scooter for a test run. The lighter rollers in the variator made a noticeable difference in the acceleration speed but did nothing to the overall top speed. The better airflow I believe was responsible for an extra 2mph however, at 34/35mph the bike began to yuck and pull and jerk about as if it was choking or not fuelling correctly. I wasn’t able to confirm if the original indicator fault was still present.
One other thing that the instructions suggested for higher performance or if you wanted to race the bike was to remove the narrow pipe insert seated in the end of the exhaust can. The pictures showed this could be done simply by grabbing the pipe with a pair of pliers – NOT SO! We ended up using our Dremmel to grind away two welds and then removed the piece. The difference in the sound of the pipe after removing that piece is surprisingly good. Instead of the puffy hairdryer sound it previously had the sound became much more basey. More like a motorbike than a scooter. Although this still did not solve the problem we experienced at 35mph.
Given that the indicator fault was present before we installed the rest of the kit we think there could be a problem with the CDI unit we originally installed. So tomorrow we are going to fit the new CDI that came with the kit to see if there is a difference.
Getting your hands on the Polini kits is not a quick job in the UK – at least it wasn’t for us and I’ve noticed a few other people in the forums complaining of delivery times. We originally ordered ours from our local motorbike shop and after a month of waiting we were told that it could be another 3 weeks. We canceled that one and ordered from Motorcycle Technics in Stowmarket, they got it in about 2 weeks. I believe the problems on delivery times lie somewhere between Polini and the importer.
There are some helpful people and some good information about Honda Zoomers (or Ruckus as its also known) on the TotalRuckus forum.
www.totalruckus.com


